So what do you do when your FO is perfect except for the *teensy* problem of not being long enough from the cast-on edge (for a traditional bottom-up sweater), or, if knit from the top down, the neck is too long or otherwise requires adjustment. Well, I can tell you from previous experience that frogging from the cast-on edge is an entirely different ballgame than your usual oops-I-need-to-tear-back-10-rows-from-where-I’m-working frogging. While I’m at it, frogging = rapidly pulling out knitted stitches, backwards, tugging steadily on the yarn from the place where you’re currently working (removing stitches from left needle). Apparently the term is so named from the sound “ribb-it, ribb-it” that comes with each rapid pull to unravel the stitches.
Usual frogging: well, if it happens as often for you as it does for me, you get to view it as some kind of cathartic experience, right? Right?? If I didn’t make myself see (or pretend to see) it as a fresh opportunity to get it right the second (or seventh) time, I’d lose my marbles.
Reverse frogging, i.e., unraveling from the cast-on edge: you’re welcome to try it for yourself, if you haven’t already, but attempting to frog work from the cast-on edge just doesn’t work. There’s certainly no “ribb-it” involved, because as much as they look like they might, the stitches don’t melt away like butter with a tug on the yarn as they do moving backwards from mid-bodice of your sweater. Not to say you can’t undo what’s been done, it just requires a little more patience.
In short, if you need to take out stitches from the cast-on edge, your choices are the following:
- Attempt the reverse frog: as already warned, this is a slow unraveling process, beginning from the slip knot that started out as the first stitch of the project. I’ve attempted this to unravel about an inch from the bottom of a sweater. Yes, it can be done, but this is likely to be the longest inch of your life – just so you know. It’s amazing how convoluted the route of that little piece of yarn seems in reverse. Unfortunately, even after all that work, it’s not a very clean operation to get your needle back in there to bind off at the length you’re after. When you start unraveling from the beginning, you’ll be tempted to pull and see what happens, and sometimes you’ll end up unraveling up into another row, rather than across. You’re likely to have trouble finding a “lifeline”, or one set of loops on the same row all the way around, from which to continue knitting or just to bind off.
- Cut to the chase: this sounds scary, and it is in concept, but it’s actually the cleanest way to do it that I’ve seen. The word cut does indeed mean cut – as in, “Look at me, I’m cutting into my knitting!”. Yes, I too had heart palpitations at this suggestion initially – sacrilege! – but I remembered my previous less-than-graceful attempt at a reverse frog, and decided the cutting method was worth a try. Here is my process, documented with pretty pictures, which worked very well for this project:
How to shorten from the cast-on edge
In this case, I’m removing 1 inch from my too-long turtleneck.

Just a wee bit too long
Step 1: Try on the garment to determine exact measurement of length to be removed.

Place marker at 1″
(Note: stitches still unblocked)
Step 2: Mark measurement with a stitch marker (I wouldn’t advise eye-balling this).
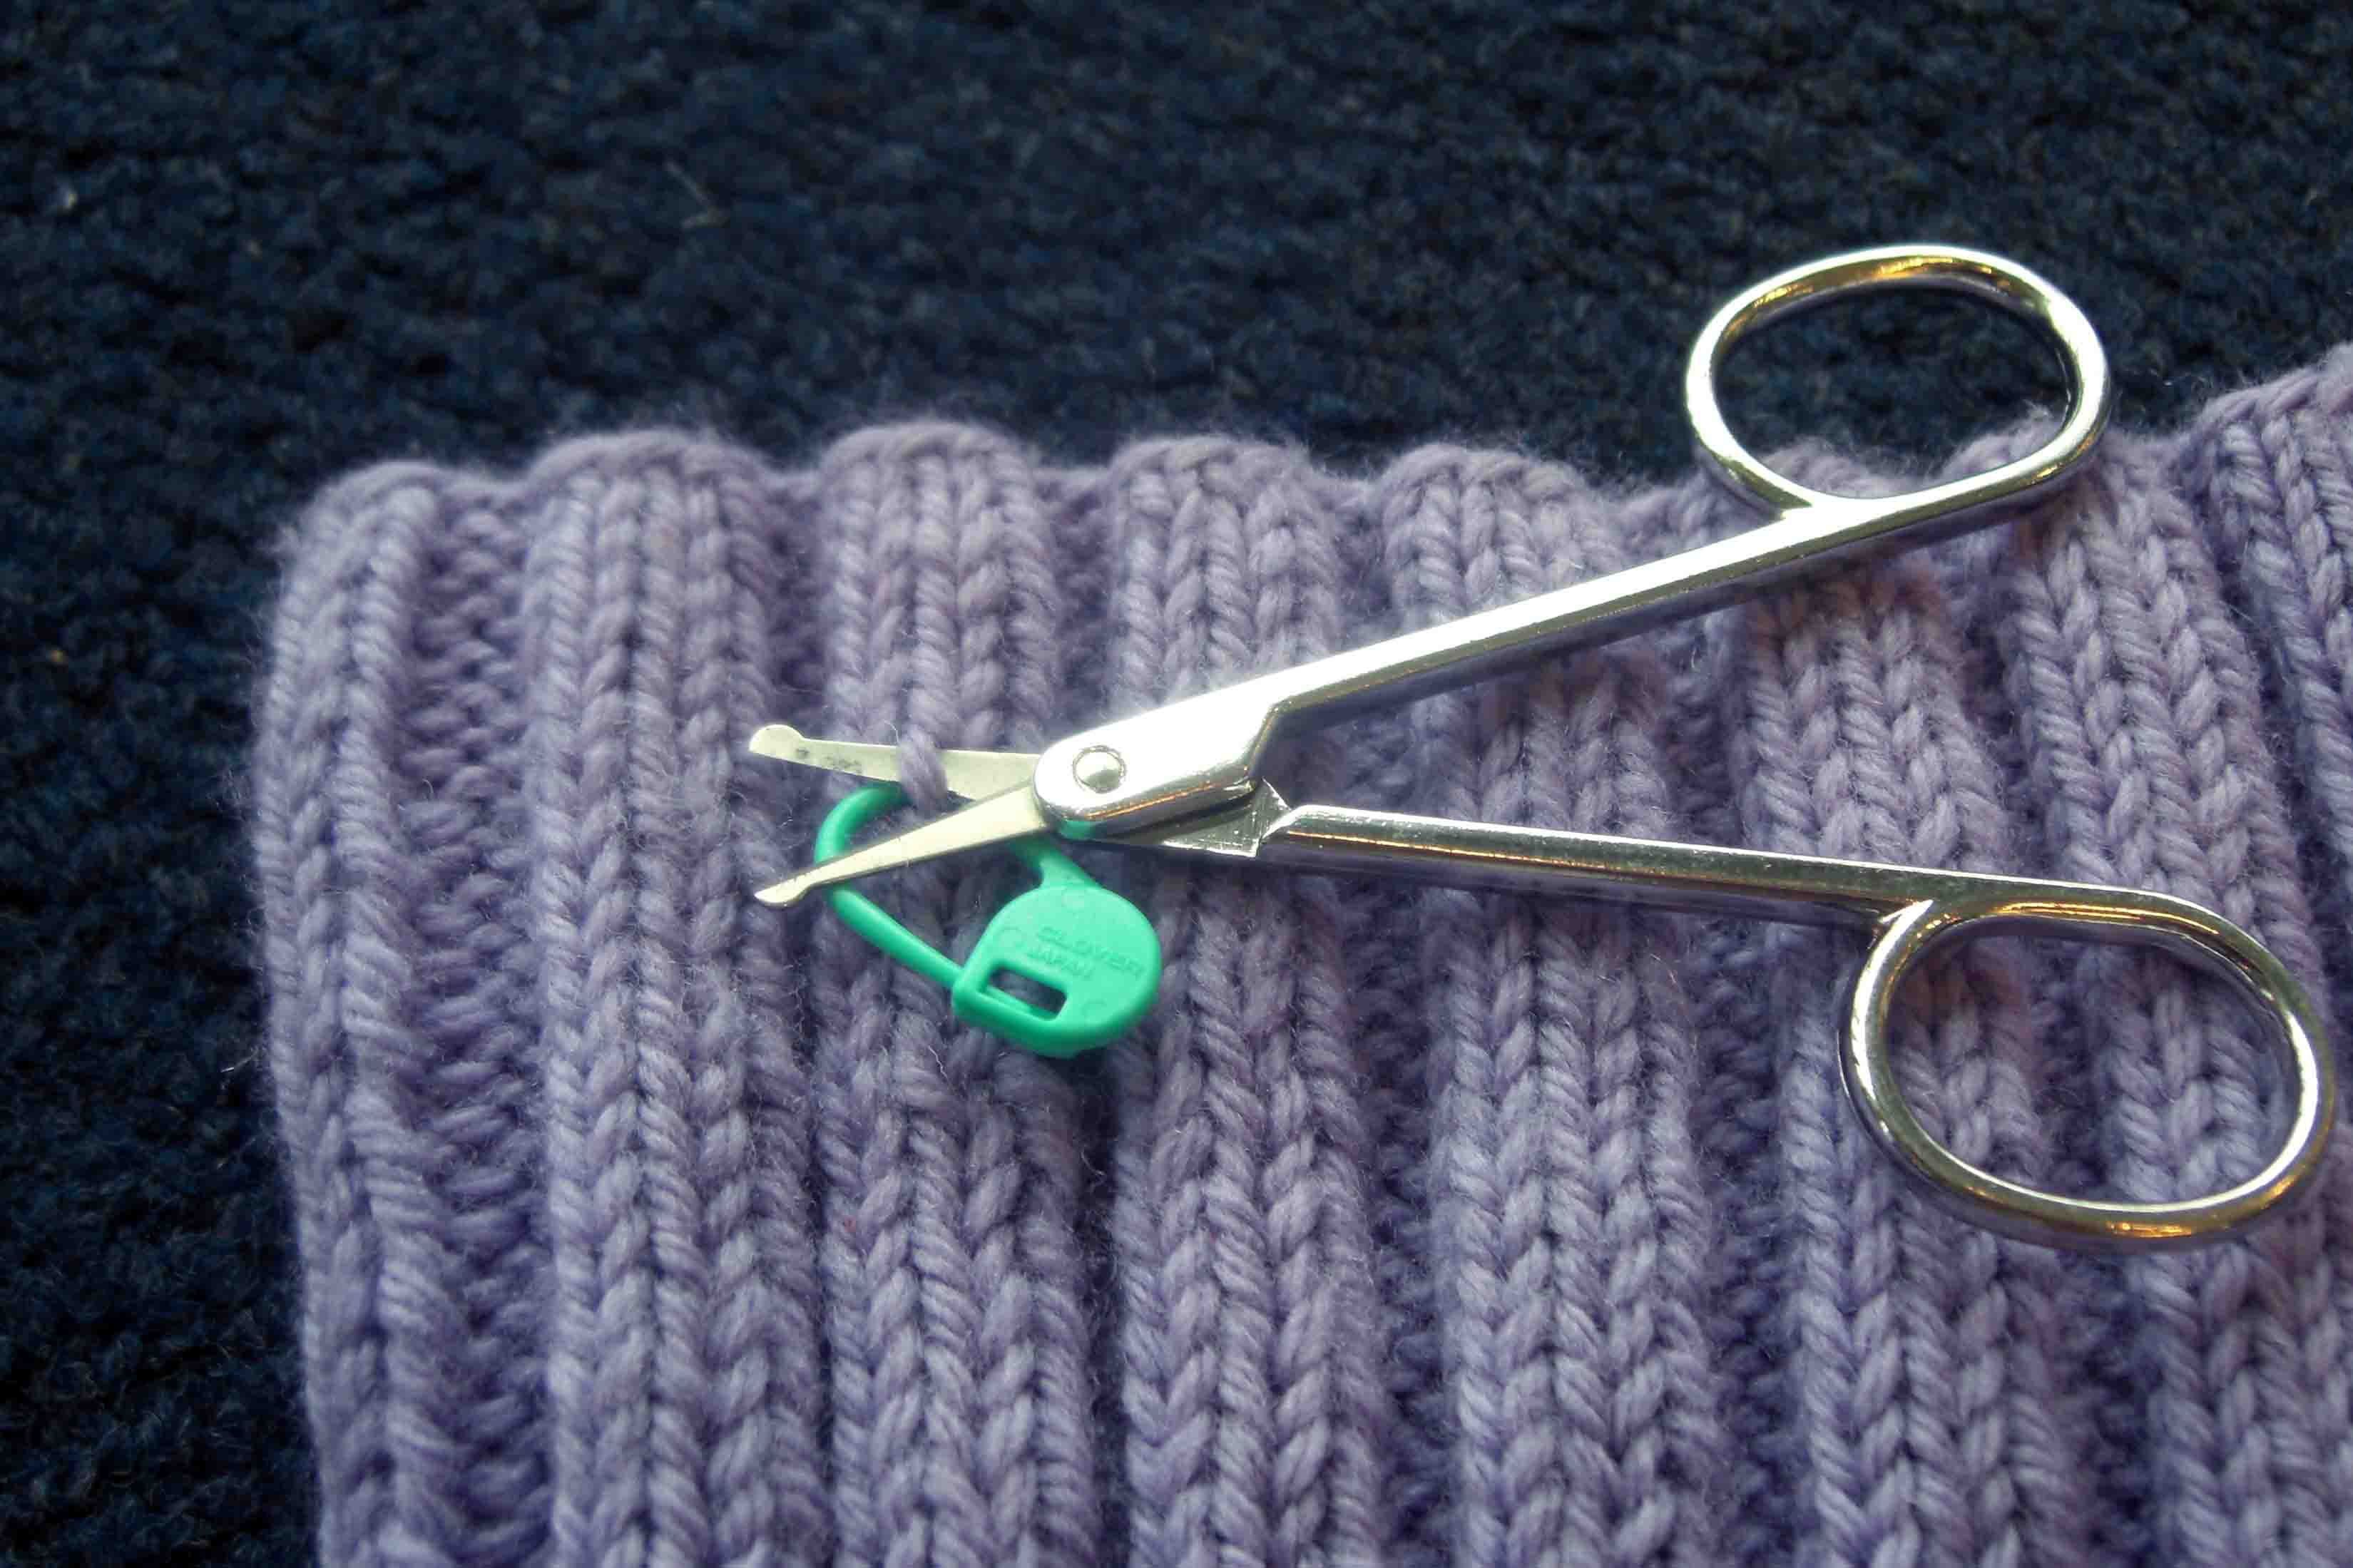
Step 3: Place scissors in position to cut one stitch, ideally on the side or back of garment.

Step 4: (breathe) Cut. (breathe) It’s OK. Everything’s going to be OK here.

Tip: use the other end of
the needle to help unravel
once the lifeline is established.
Step 5: With your needle tip at the ready, begin to unravel one of the loose ends, gently. You’ll see first one loop (just hanging out, looking for attention), then another emerge as you’re unraveling. Immediately slide these loops onto your needle. This is your “lifeline”.

Step 6: Continue sliding on the loops that free up as you unravel all the way around until the entire lifeline is on the needle.

Halfway around, you may want
to unravel from 2nd loose end

Ready to bind off at new length
(or add new color or design)
If you’re working with a circular needle (as pictured here), once you reach the halfway-around point, you may find it easier to slide the stiches to the opposite end of the needle and begin slipping lifeline stitches on to that end, as unraveled from the second loose end of the original cut. This is 100% optional, but you may find it easier since the remaining loose end will be shorter and therefore quicker to pull out and through the extraneous stitches. If you’re working with straight needles and a seamed garment with front & back sides, you’ll need to first un-seam and then perform this process on each side.
That’s it. Not too complicated, and I’ve documented and illustrated every step right here. The lifeline is a very clean way to jump back into the knitting when you find yourself in need of an alteration when you’re well past being able to consider the traditional frogging solution.

I should note that once I had my lifeline completely on the needle, I did not complete any further knitting, but went immediately into my bind-off final row. As Annie points out in her “Tricks” post on www.modeknit.com (from which I gained the confidence to try the method she refers to), any kind of unraveling from the cast-on edge is going to result in a slight shift in alignment of about a half-stitch, since the loops that form your lifeline are not actually the same loops that you’d be using to stitch if you were knitting along in real-time. This shift is not distinguishable, practically speaking, if all you’re going to do is bind off (as I did – I can’t tell any difference from the normal bind-off look).
Where this shift might matter is if you wanted to add on from where you’d cut in (for instance, if you wanted to cut off 2 inches at the bottom of a sweater and add a stripe or ribbing in a different color, or perhaps re-knit those 2 inches with little “V” vents on the sides. In this case, you may be able to distinguish this slight half-stitch shift in alignment at the point where you are joining in with new knitting, but it’s probably not too big of a deal – especially if you really want to make the change/addition you’re after.
")
")

15 Jun 2008 at 4:03 pm
[…] to fix a too-long giraffe neck, but it all worked out, and the upside is that now I’ve got a new technique in my bag to share. Needless to say I could’ve prevented the neck problem if I’d tried on the turtleneck […]
26 Aug 2014 at 7:21 am
Thanks for describing it in detail and with pictures. I’m a seasoned knitter but will have to unravel from the cast-on edge for the first time. I couldn’t figure out how to do it efficiently and make it look clean until I saw your description. THANKS!
26 Aug 2014 at 8:45 am
So glad the description helped! I remember being surprised not to find guidance anywhere online so I figured I’d experiment and post myself.
03 Feb 2015 at 5:46 pm
Thank you so much, I have looked everywhere for this info, but couldn’t find it until now. You were so kind to share this!
24 Oct 2015 at 2:03 am
Yes I’ve done this before, but cut the whole length of knitting, so it was a real mission to get it all back together again. I now need to do it again where a jacket is perfect from the waist up, but the very gathered lower half is way too voluminous. I’m going to redo it all from the waist down. Thankyou so much for info……was awake last night trying to figure out what to do!
24 Oct 2015 at 10:37 am
Wow, I’m about to try this on that beany I just finished that keeps falling on my eyes…. I need to take a few deep breaths first :)
20 Nov 2015 at 10:51 am
Thank you thank you thank you! Just tried this on a hat that was way to long and it worked beautifully!
11 Feb 2016 at 12:13 pm
I am really nervous about trying this, but the only other option is to rip out the entire right front of a semi-complicated jacket and do it all over again. At least I know I have that option if the (ack) cutting fails. Thanks!!
23 Sep 2016 at 12:53 pm
I started with option 1 and moved to 2 because i needed to take out several in on my sweater cuffs. Very enlightening process. I advise you to knit it right in the first try so you do not have to do this! Thank you for help!!! 😄
07 Dec 2016 at 6:22 pm
The sleeves of a cardigan I finished were way too long. Your directions worked great. The yo pattern was a bit dicey but it all worked out. It was scary, but it worked. The thought of taking the whole sweater apart and then rework the sleeves was daunting. Thanks!
09 Dec 2016 at 4:00 pm
Great tutorial, I used it successfully to shorten my first sleeve. Thank you very much!
30 Jan 2018 at 6:25 am
I just finished a sweater that is done in one piece. I would have had to take the entire thing apart because it starts at the sleeve edge. I have long arms, but these were entirely too long lol. Thank you for this tutorial.
25 May 2018 at 3:40 pm
Great instructions and pictures. Really clear and easy to follow, this worked very well to help me shorten some over long sleeves. Thank you very much.
04 Oct 2018 at 11:32 am
Hello,nice share.
04 Oct 2018 at 11:32 am
Hello,nice share.
08 Jan 2019 at 1:04 pm
You. Have. Saved. My. Sweater.
04 Apr 2019 at 8:34 am
hi, are you still here?! I have a query! my front of the shoulder is too long at the shoulder seams and I need to cut down an inch or so.how would you advice I go about this? this is the pattern I am following. would you be able to help me? Thanks!
https://www.ravelry.com/patterns/library/basic-pullover-and-vest
27 May 2019 at 11:01 am
I followed the frogging method so I can lengthen my sweater. It worked perfect in the back as there was no design. However, the front has a cable design over 36 stitches with 6 knit, 3 purl, 4 knit, 3 purl, 4 knit, 3 purl, 4knit, 3 purl, 6 knit. I am having trouble returning the stitches to the needle so I can continue the pattern. It seems like I am always missing a stitch in the correct order (meaning knit when I have 4 knitting stitches etc….
Any suggestions?